Saturday 31 December 2011

Pinto Beans with Basmati Rice & Jalapeno Cornbread


Soak dry pinto beans overnight in a pot with water just covering the top of the beans.  Drain, and pick through to clean any debris from the beans.  Simmer in water with chopped onion-bacon-salt & pepper for a  few hours till beans are soft adding more water when necessary.  I like a fair bit of pepper in my beans so I use it pretty liberally...to taste : )

Serve immediately once finished baking.

Drizzle with honey.


Corn bread drys out pretty quickly, so it is best enjoyed the first day while at it's freshest.  It certainly does warm up nicely the next day, although it is not as moist.  After the second day though I would have to be sure it was eaten or come up with a creative use for it.

Cornbread

Whisk together 1 1/4 cups yellow cornmeal
3/4 cup flour
2 1/2 teaspoons baking powder
1-4 tablespoons sugar
3/4 teaspoon salt

Add
2 large eggs, whisked
2-3 tablespoons butter
1 cup milk
minced jalapeno-to your preferred taste

Combine quickly, don't over mix.  Pour batter into a preheated hot baking dish and bake in a preheated oven set at 425 degrees.  Bake 15-18 minutes or until golden brown.

I followed the corn bread recipe found in my Joy of Cooking, 75th anniversary cook book, pg 632.

Thursday 29 December 2011

Stuffed Shells with Ricotta and Spinach


Stuffed Shells are a ton of fun to build and can be a fun way to involve friends, and family in helping to get dinner ready.  A very quick and easy recipe to put together, in no time at all, you'll be sitting down to something that seems so simple, yet tastes like a million bucks.

Chop a small onion finely, saute in olive oil seasoned with salt, pepper and a teaspoon of dill.  When soft, mix in 2 bags of fresh spinach (700-800g in total), saute until wilted, set aside, and let cool.  Mix in 1 package of Ricotta (500g), 1/3-1/2 cup of Parmesan cheese and 1 beaten egg.  Blend together and fill shells.

Boil your jumbo shells in well salted water until al dente, drain, let cool till you can handle them while filling.

Place enough sauce in the bottom of a 9x13 baking dish to just cover it, rest your stuffed shells into the sauce.  When I cover the tops of the shells with the sauce I try to leave some of the nice green and white colors peek through, so I don't smother it.  I mostly try to cover the bare outsides of the shell with sauce, leaving the Spinach Cheese mixture uncovered.  Grate fresh Parmesan cheese on top.

Bake in a preheated oven set at 350 degrees for 30 minutes till heated through well.

Plate for serving and enjoy : )


Mixing Ricotta with Spinach mixture


Adding Parmesan

Add 1 beaten egg

Place stuffed shells in a dish covered in sauce

Little soldiers

Peek a Boo

Top with Parmesan (my new grater : )

The ONLY brand of jumbo shells at the store, weird...one choice : ) They worked perfect

Dinner is served

And a second helping : )

Wednesday 28 December 2011

Stuffed Pork Tenderloin with Prosciutto, Spinach, and Mushroom


I've already shared with you how large a fan I am of everything pork.  Bacon-ribs-ham-sausage-roast-chops and the tenderloin.  If luck has it and there's a chance to have it stuffed with something delicious, well...count me in : )

Today I decided to do something a little more fancy with something we love to have for dinner, the pork tenderloin.  Usually, we marinade it and roast it, but today was a day for rummaging through the frig for something to stuff it with.

Begin by slicing the tenderloin down the center creating two halves, be careful not to cut completely through, fold gently open.  Repeat this step down the center of the two sides, do not slice completely through, we are only trying to open it up a little more creating a larger surface to flatten nicely.

Lay between two sheets of parchment or wax paper, using a rolling pin, flatten tenderloin to about 1/2 inch thick.

Season the inside of the tenderloin with a pinch of salt and some pepper.  Lay four slices of Prosciutto on the pork and cover with a stuffing of minced mushroom and onion, sauteed with sage, a pinch of thyme, salt, pepper,  & garlic powder, only cook until water from mushrooms has evaporated. Don't let them brown, add a small handful of fresh chopped parsley, two good handfuls of spinach, and once the spinach wilted I mixed in a teaspoon of dijon mustard, delicious!  Leave at least a 1/2 inch border around the edges of the tenderloin. 


Roll tenderloin lengthways making sure the first roll is as tight as you can make it.  This will help during the rest of the rolling process.  Use kitchen string or skewers to keep roll closed.  I like kitchen string, it wraps around nicely and keeps everything inside where it belongs.


Be sure to season the tenderloin on the outside as well before searing all sides till golden brown in heated olive oil.  This pic (above) is the underside of the tenderloin, I season both sides and check to be sure all the stuffing that has peeked out is tucked back in.

Place in an oven dish after searing.  Bake in a preheated oven set at 350 degrees for about 25-30 minutes.  Remove from oven when juices run clear, cover with foil and let rest 5-10 minutes. 

Remove the string or skewers from tenderloin and slice in coin shaped discs and serve, delicious!


The pork is moist, and the filling looks beautiful, a great dish to serve to company as well, it's sure to impress.

Plates nicely.

We served it with steamed cauliflower smothered in a lovely white cheddar sauce, and one of our favorite potato dishes...roasted squished baby potatoes.


JWsMadeWLuvMondays

Monday 26 December 2011

Honey Maple Glazed Picnic Shoulder Ham


The ingredient measurements are approximate, as I was just winging it...I knew what I wanted and poured amounts until I was happy with the amount I had in the pan.  I then adjusted the flavor to taste, adding more syrup at one point.  If it tastes good in the pan, it will be that good and better when basted on to your ham.  

Brown Sugar (3/4 cup), Maple Syrup(1/4 cup), Honey (1/2-3/4 cup), Ginger ale (3/4-1 cup), Dijon Mustard (1-2 tablespoons), Red Wine Vinegar (a splash), mix together and adjust ingredients to taste, simmer over medium heat until dark in color and thickened. 

Score the top of the ham in a criss-cross pattern to create diamonds.  I took the skin off this ham, scored the top fatty layer, and studded it with a few cloves, placing them into the centers of the diamonds.  Glaze ham, dripping the glaze slowly over the ham, bake in an oven preheated at 375 degrees.  Glaze and show your ham some love by basting it every 10 minutes or so.  I baked this one for about 2 to 2 1/2 hours until heated through and I was happy with the glaze and color of the ham.
It is a fatty cut of ham, so trimming is necessary but worth the effort.  The ham is moist, and the mixture of the cloves and the glaze made this ham addictive to eat.  One of my best tasting ham's yet.

One of the nice things about the glaze and juices that were used to baste the ham is that they can easily be placed on the table as a syrup/sauce for garnishing your ham.  Drain all of the juices from the pan you used for the ham into a bowl.  Using a spoon slowly skim the surface removing any clear juices/fat leaving behind only the dark syrup.  Cooling in the frig helps too, as it brings the fat to the surface making it easier to skim (if you have the time), you can reheat the glaze after skimming if using the frig method.
Place in a serving dish and drizzle on your plated ham, delicious!

Sun Dried Tomato, Garlic and Feta Bread


On this second day of Christmas I would like to share with you my humble beginnings at bread making.

Adding beautiful ingredients to a bread loaf is a great way to dial things up a few notches.  For our Christmas Eve feast, I decided to make a version of  a garlic, olive, spinach loaf I made last time we had company for dinner.  Being out of spinach and only having about 6 olives, but with lots of other yummy stuff on hand, I decided to be creative and wing it.  Some of the ingredients I used were Feta and Romano cheese, olives, garlic, shallot, sun-dried tomatoes, a small bit of fresh parsley.  I am so looking forward to it : )

Classic bread loaf

1 pkg of active dry yeast
3/4 cup warm water

Pour warm water into yeast and let stand for five minutes.

1/2 cup milk
2 tablespoons sugar
2 tablespoons butter
1 teaspoon salt

Place ingredients in a saucepan and heat over medium heat until just warm.  Mix milk mixture into yeast mixture.

2 1/2 cups of flour

Add flour to wet ingredients and combine.  Place dough in a large bowl sprayed with cooking spray and cover with plastic wrap that has also been sprayed to avoid it sticking to the dough.  Place into the frig and let it chill overnight.

The next day, remove the dough from the frig and set it out on a well floured surface, cover loosely with greased plastic wrap and allow to rest there for thirty minutes.

Grease a baking sheet and sprinkle it with cornmeal, shape your dough into an oval shape and place it on the baking sheet, let it rest in a warm place for about an hour or so to allow it time to almost double in size.

Mix a small amount of water with a beaten egg and brush over the entire loaf before baking.

Bake in a preheated oven set at 400 degrees for 25-30 minutes.

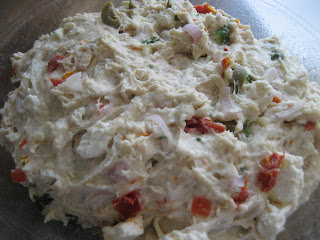
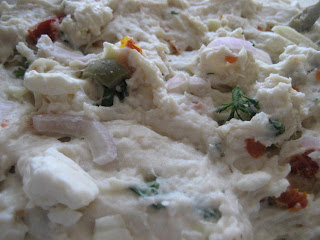
To bump things up a bit in a regular loaf of bread, I add fun ingredients.

This time I added...
2-3 large cloves of sliced garlic
4 chopped sun dried tomatoes
6 sliced kalamata olives
1 sliced medium shallot
3/4-1 cup crumbled feta cheese
small handful of chopped fresh parsley
I mix them into the warm milk mixture before adding it to the yeast mixture, then continue following classic bread loaf directions.


After the dough has sat overnight, turn it out on to a floured surface, cover, and let rest for thirty minutes.

Looks yummy

After allowing it to rise, shape dough into an oval shape.  Brush with an egg wash (beaten egg with a splash of water).

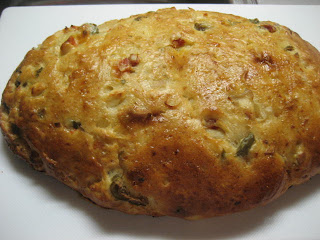
Bake to a golden brown

Delicious!

I need a name for this bread, I was calling it my kitchen sink loaf : )

My first baking of this loaf found me putting these ingredients in...

Olive Garlic Loaf

Spinach
Garlic
Feta Cheese
Kalamata olives
Parmesan Cheese

It was delicious...


Original recipe and directions for the Classic Bread Loaf, and the Olive Garlic Loaf can be found in the Better Homes and Gardens Special Interest Publications, Holiday Recipes - 2011, Pg 93.


Thursday 15 December 2011

Brussel Sprouts with Bacon


I never cared for Brussels sprouts while growing up, in fact, I couldn't stand them.  I didn't like the smell of them cooking and couldn't eat them without grimacing.  Things have changed though, and over the years I have found that Brussels sprouts are in fact a very tasty vegetable and can be a beautiful side dish to your main course.  I am sure my mom would be very proud and happy as she has always loved them, she would ask, "How can you like cabbage, and not like Brussels sprouts?".  I always responded, "I don't know, but yuck!".

One of the foods I love is pork.  Pork anything! Pork everything! : ) So, what can make Brussels sprouts better? Bacon of course...I like to use a thick sliced bacon rather than the traditional type.

Start by cooking your bacon till crisp, sliced into match size pieces, when done...lay on paper towel to soak up grease until bacon is needed.  Drain excess grease from pan leaving only enough to saute your Brussels sprouts.

Slice a bit of the bottom off of your sprouts, and slice in half.  Blanch your Brussels sprouts for 2-3 minutes in simmering salted water.  Cook only until fork tender.

Place sprouts in the hot pan you cooked your bacon in with around a teaspoon of bacon grease, lying face down.  Lightly sprinkle them with fresh cracked black pepper.

Saute until lightly golden brown, add your bacon back in near the end to rewarm the bacon.

Finish with a good squeeze from half a fresh lemon to brighten the flavor of everything and bring it all together.  Serve as a side dish with your main, delicious!

I like cooking the bacon first to avoid making my Brussels sprouts too greasy from the bacon.  The cooking time is shortened due to the blanching of the sprouts and they have a beautiful bright color due to the short blanching time.


Wednesday 14 December 2011

Tuesday Tip of the Day - Holiday Baking


I know it's not Tuesday today, but I've been tied up in the kitchen for a couple of days, and didn't have a chance to post yesterday.   I think though that I would still like to share a few really good ones with you this week.  Three, 3-layer cakes, two black forest tortes, 4 dozen chocolate chip cookies, 8 dozen lemon cheesecake mini tartlets, 87 pieces of peanut butter marshmallow squares, 2 chocolate pies, and 1 strawberry trifle later...I am ready to rest for awhile.

Since it's the holiday season, there are certain products we buy, cook with, and enjoy that we may not the rest of the year along with many we may use every day.  For this reason, there are a few tips I can share that help myself when I read them again as a reminder, and I hope will help you next time you are working with these items.

Cranberries, the higher they bounce...the fresher they are
Eggs, the heavier they are...the fresher they are
Pomegranates, the heavier they are...the more juicy they are
Turkey, the longer you let it rest...the tastier it will be
Chocolate curls, keep chocolate at room temperature until needed...makes it much easier to curl

Just a few tips I hope you find useful...do you have any tips you can share that might help during this holiday season?

Tip...prick pastry when making pies with prebaked shells with a fork to allow air to steam through pastry.  Create holes throughout the entire bottom and along the sides.  If crust begins to bubble up while cooking, simply remove pastry from oven, using a fork, poke a few additional holes in the crust and resume baking.
Some of my recent baking.

Triple Layer Vanilla Cake with a crushed Peppermint top


Frosting my Black Forest Torte

Everyone's favorite...Chocolate Chip Cookies

Baked to a light golden brown

Until next time we meet here again, happy cooking-happy baking : ) I hope you find some of these tips helpful.  Use the commenting Disqus section below to leave a tip of your own you would like to share, I'd love to hear from you and learn something new.  If you experience difficulty leaving a comment, visit our Face Book page to let us know and leave your helpful tip there, thanks! http://www.facebook.com/RecipesSwap
Related Posts Plugin for WordPress, Blogger...